Web Application
Models for object classification, detection, or instance segmentation can also be deployed as a web application. The cvtk package provides commands to easily generate example code for this purpose.
Object Classification
First, refer to the object classification tutorial to build and train a model.
Assume the source code for object classification
generated by cvtk (using ResNet18 by default) is saved as cls.py,
and the trained model’s weights are saved in ./outputs/fruits.pth.
Then, follow the steps below to create a web application for the object classification model.
The cvtk deploy-demoapp command is used to generate the source code for the web application.
This command requires the following arguments:
--app_name: The name of the project. A directory with this name will be created to store the web application source code.--script_name: The source code file (e.g.,cls.py) generated by cvtk for object classification.--label: The label file used for training the classification model.--weights: The trained weights file (e.g.,./outputs/fruits.pth) of the classification model.
cvtk deploy-demoapp \
    --app_name fruits_cls_app \
    --script_name cls.py \
    --label ./data/fruits/label.txt \
    --weights ./outputs/fruits.pth
If the command runs successfully, a directory named fruits_cls_app will be created,
and source code files for the web application will be generated in it.
Next, execute the following command to start the web application server:
cd fruits_cls_app
gunicorn --bind 0.0.0.0:8080 main:app
You can now access the object classification model through a web browser at http://localhost:8080.
Additionally,
you can also modify the object classification source code
to be independent of the cvtk package.
In this case, generate the model script with --vanilla.
Note that the object classification source code itself must also be generated with the --vanilla option.
cvtk deploy-model --script_name cls.py --backend torch --task cls --vanilla

# train the model with cls.py

cvtk deploy-demoapp \
    --app_name fruits_cls_app \
    --script_name cls.py \
    --label ./data/fruits/label.txt \
    --weights ./outputs/fruits.pth
Object Detection
First, refer to the object detection tutorial to build and train a detection model.
Assume the detection source code generated by cvtk is saved as det.py,
and the trained model’s weights are saved in ./outputs/strawberry.pth.
For MMDetection models, keep the generated config file
(./outputs/strawberry.py) next to the weights file.
Then, generate the web application source code with the following command.
cvtk deploy-demoapp \
    --app_name strawberry_detapp \
    --script_name det.py \
    --label ./data/strawberry/label.txt \
    --weights ./outputs/strawberry.pth
This will create a directory named strawberry_detapp,
containing the web application source code.
Next, you can start the web application server as follows.
cd strawberry_detapp
gunicorn --bind 0.0.0.0:8080 main:app
Now, you can access the object detection model through a web browser at http://localhost:8080.
Note
If MMDetection detection or segmentation checkpoint loading fails with a PyTorch weights_only error
for a checkpoint that you created and trust, start the server with
TORCH_FORCE_NO_WEIGHTS_ONLY_LOAD=1.
For example:
TORCH_FORCE_NO_WEIGHTS_ONLY_LOAD=1 gunicorn --bind 0.0.0.0:8080 main:app
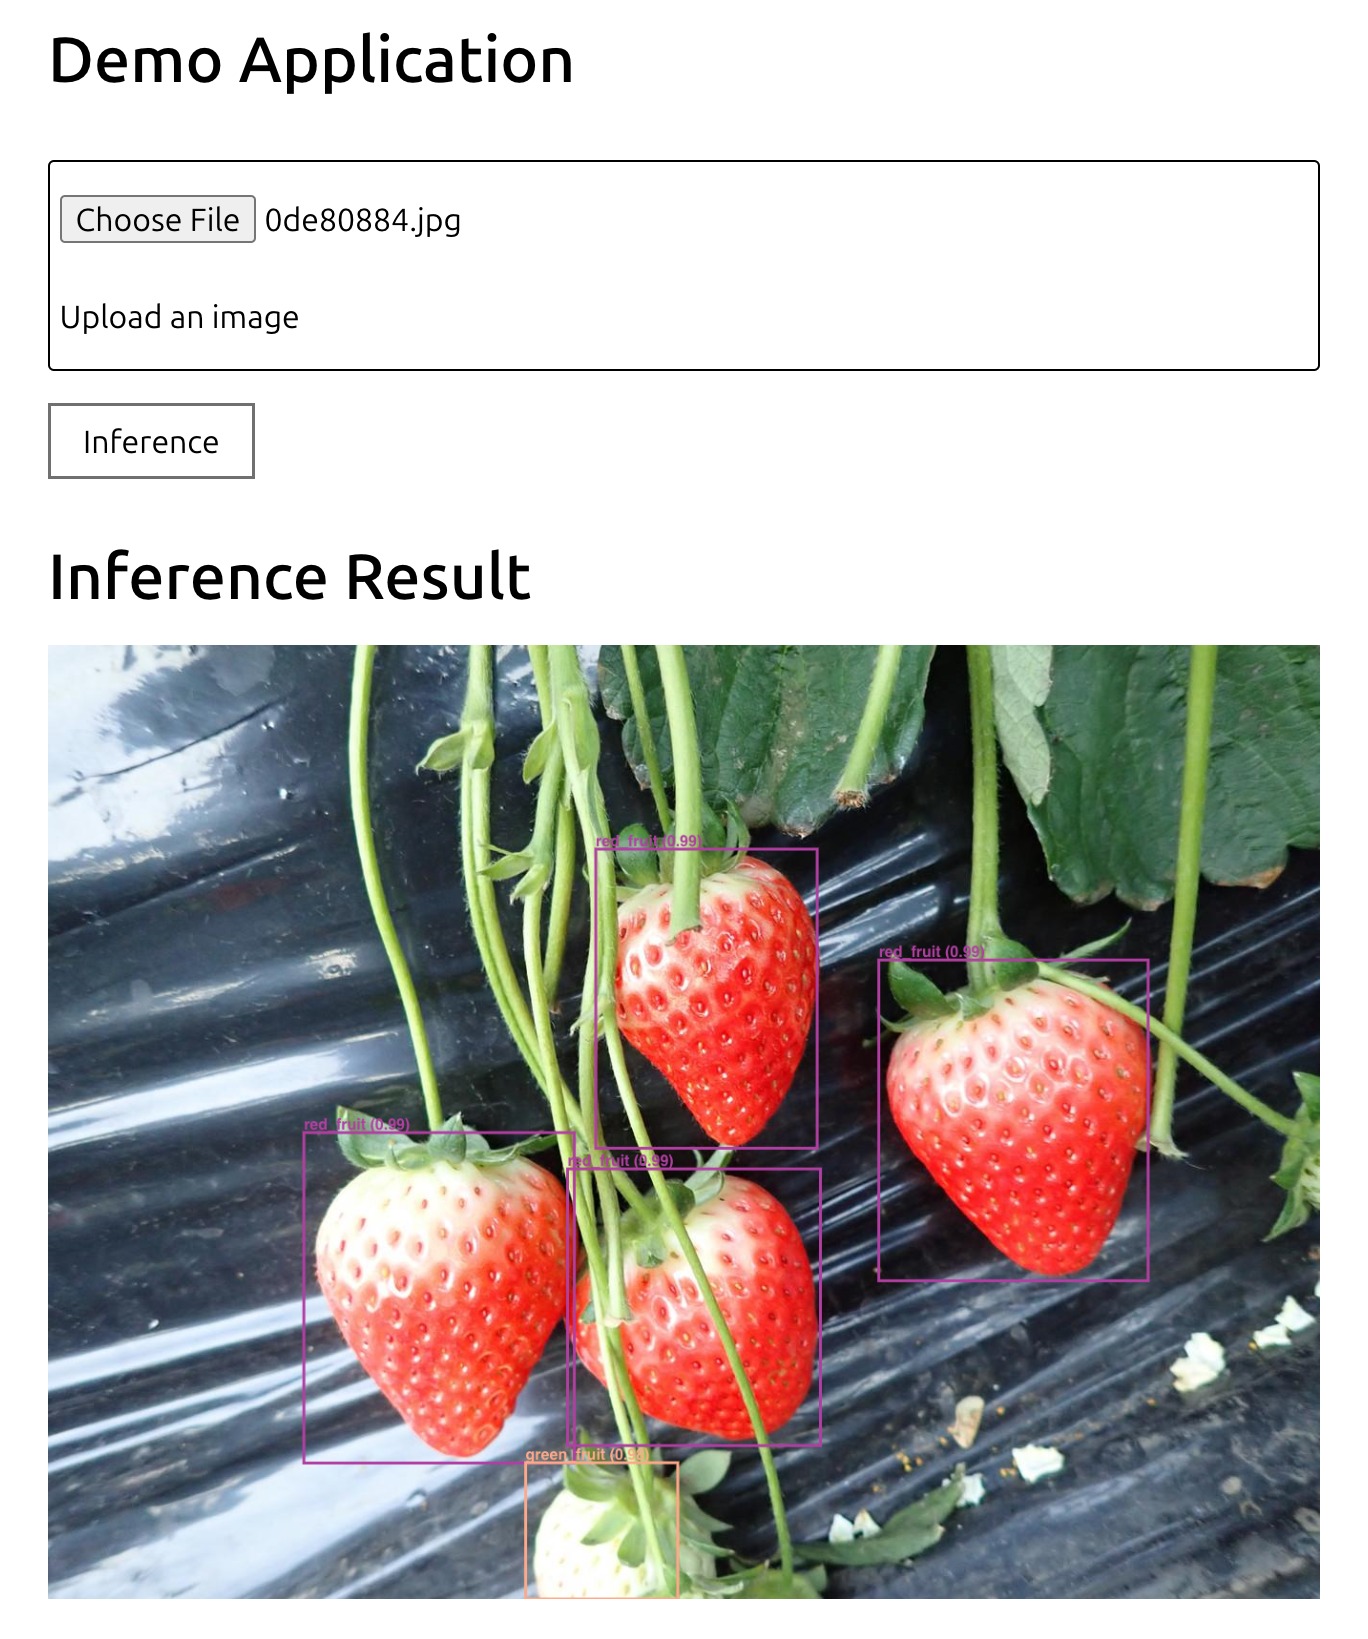
As with classification, the detection model can also be deployed without depending on cvtk.
First, generate detection source code with the --vanilla option, train the model,
and then generate the web application with cvtk deploy-demoapp.
cvtk deploy-model --script_name det.py --backend mmdet --task det --vanilla

# train the model with det.py

cvtk deploy-demoapp \
    --app_name strawberry_detapp \
    --script_name det.py \
    --label ./data/strawberry/label.txt \
    --weights ./outputs/strawberry.pth
Instance Segmentation
First, refer to the instance segmentation tutorial to build and train a segmentation model.
Assume the segmentation source code generated by cvtk is saved as segm.py,
and the trained model’s weights are saved in ./outputs/strawberry.pth.
For MMDetection models, keep the generated config file
(./outputs/strawberry.py) next to the weights file.
Next, generate the web application source code with the following command.
cvtk deploy-demoapp \
    --app_name strawberry_segmapp \
    --script_name segm.py \
    --label ./data/strawberry/label.txt \
    --weights ./outputs/strawberry.pth
This will create a directory named strawberry_segmapp,
containing the web application source code.
Then, start the web application server as follows.
cd strawberry_segmapp
gunicorn --bind 0.0.0.0:8080 main:app
You can now access the instance segmentation model through a web browser at http://localhost:8080.
To deploy the segmentation model without relying on cvtk,
first generate the segmentation source code with --vanilla,
train the model, and then generate the web application with cvtk deploy-demoapp.
cvtk deploy-model --script_name segm.py --backend mmdet --task segm --vanilla

# train the model with segm.py

cvtk deploy-demoapp \
    --app_name strawberry_segmapp \
    --script_name segm.py \
    --label ./data/strawberry/label.txt \
    --weights ./outputs/strawberry.pth